Baby's Room - DIY - Americana DECOR Chalky Finish Paint
I recently took on an involved but happy project. I'm excited to say that my son and daughter in law are going to have my first grandchild! So of course Vic and I just had to help out with preparing the baby's nursery. Below is the step by step progress....
The main project was to be a changing table with bins and baskets for storage, a mirror for the wall, and a bureau.
Vic began by building the changing table from scratch! He created one that could be converted into a child's bookcase later.
Meanwhile, I scanned online and chose some metal bins for the bottom shelf that were large and could be filled with diapers, clothes or other supplies and some lined baskets for the top shelf for lighter and smaller supplies.
The baby's parents picked out a mirror at Home Depot and then I went to a local shop that sells used furniture for refurbishing and found a perfect bureau. (Michelle's Creative Expressions)
To create a soft, dreamy, baby appearance, I used a brand new product on the market by DecoArt called Americana DECOR Chalky Finish Paint. I am a member of the DecoArt Blogger Outreach Program and was given the products in colors of my choice to complete this project. However, I will be honest in my evaluation of the products used.
The colors that worked with the Parents choice of color scheme were Refreshing (green) Treasure (teal/turquoise blue) and Everlasting (white).

**I recommend that you read through ALL information on any products that you use, BEFORE using them. That way you will be aware of any issues or recommendations made by the manufacturer and you will understand how the product will perform before getting into the middle of it and finding out.
Let's get started.....
The bins were galvanized metal with jute or rope handles.


I have worked with other brands of chalky paint before and found that it was tricky to apply, especially the more coats you applied, but honestly DecoArt's product was super easy to use. I also found that the Americana Chalky finish covered all that I needed it too and I had plenty to spare.
I proceeded and painted Refreshing on the inside of the bin. (really pretty color combo!)

Although the paint doesn't require priming ahead of time, it does still require a protective finish. You can choose a wax finish to keep the chalky matte look that you use this paint for, or you can use varnish. I applied Americana DECOR Creme Wax.

I applied the wax using the Americana DECOR 2 inch brush. The wax went on smooth and easy. It got inside the gaps and seams really well. And again I found this product really easy to use especially with the brush....you know what they say, the proper tools make the job easier. :)

Easily clean the wax and paint out of brushes with soap and water.

I let the bin set so that the wax would cure and then I added coordinating ribbon for handles - SO CUTE.

This is the finished bin. From ugly galvanized tin to pretty and ready for baby things!

Next up were baskets for the top shelf of the changing table. I bought two dark utility baskets.
They already had liners in them that were loosely sewed on to the basket which made for easy removal and reuse.

I carefully removed the liner from the basket and sprayed them with white primer. I was still going to use the Chalky Finish to paint them, but because I was going over a dark color I needed to get between all the weaved reeds, so priming them first was important.


After two coats of paint had dried and rested, it was time to apply the Americana DECOR crackle medium.

I applied it in various areas instead of all over because I wanted random patches to come through the white top coat. As I brushed it on, I let the brush run out of crackle medium instead of just stopping abruptly so the crackle would taper off into the solid (un-cracked) areas.

When it was dry, (about 45 minutes) I applied the Everlasting overcoat of paint. I applied the paint by dabbing it on with a sponge, using this technique created small uniform cracks. (Brushing would have caused the cracking to be larger and more in rows in the direction of the bristles. Once the overcoat of paint has been applied leave the paint alone and let it dry. If you try re-dabbing or brushing the paint it will pull and lift and make bare areas in the crackle.

I let everything rest 24 hours. I chose to use DecoArt DuraClear Satin waterbase varnish for the protective finish. I thought it would be a better protective coat against window cleaner that would be used on the mirror. I brushed it over the whole frame and let it dry.

For a few accents in the room and to play with the materials that I had, I mixed some yellow Americana paint with the Everlasting Chalky finish paint to create a soft yellow color and painted an old lamp that I found in our basement. The wax finish was applied for protection using a rag. Then I found the perfect shade for it on clearance at a nearby department store.

I also mixed some Americana Tangelo Orange paint with Everlasting Chalky Finish Paint for a soft orange color and painted the cover of a jar as a useful accent piece in the nursery.

The used bureau that I found was made from Maple and had great bones. It was the perfect size for a nursery.
 And it turned out beautifully after Vic painted it white to match the changing table and crib.


 What do you think???
Nothing was difficult about the entire project, it just took the right materials and some effort. Except maybe Vic making the changing table, but an old one could have been found and painted instead.
Now it's back to the studio and time to paint again!
The main project was to be a changing table with bins and baskets for storage, a mirror for the wall, and a bureau.
Vic began by building the changing table from scratch! He created one that could be converted into a child's bookcase later.
Meanwhile, I scanned online and chose some metal bins for the bottom shelf that were large and could be filled with diapers, clothes or other supplies and some lined baskets for the top shelf for lighter and smaller supplies.
The baby's parents picked out a mirror at Home Depot and then I went to a local shop that sells used furniture for refurbishing and found a perfect bureau. (Michelle's Creative Expressions)
To create a soft, dreamy, baby appearance, I used a brand new product on the market by DecoArt called Americana DECOR Chalky Finish Paint. I am a member of the DecoArt Blogger Outreach Program and was given the products in colors of my choice to complete this project. However, I will be honest in my evaluation of the products used.
The colors that worked with the Parents choice of color scheme were Refreshing (green) Treasure (teal/turquoise blue) and Everlasting (white).
**I recommend that you read through ALL information on any products that you use, BEFORE using them. That way you will be aware of any issues or recommendations made by the manufacturer and you will understand how the product will perform before getting into the middle of it and finding out.
Let's get started.....
The bins were galvanized metal with jute or rope handles.
To create the custom bins, I removed the rope handles, cleaned the metal with rubbing alcohol and began painting. The label on the Chalky paint told me that priming wasn't necessary so I got right to painting, applying Treasure to the outside of the bin.
I proceeded and painted Refreshing on the inside of the bin. (really pretty color combo!)
Although the paint doesn't require priming ahead of time, it does still require a protective finish. You can choose a wax finish to keep the chalky matte look that you use this paint for, or you can use varnish. I applied Americana DECOR Creme Wax.
I applied the wax using the Americana DECOR 2 inch brush. The wax went on smooth and easy. It got inside the gaps and seams really well. And again I found this product really easy to use especially with the brush....you know what they say, the proper tools make the job easier. :)
Easily clean the wax and paint out of brushes with soap and water.
I let the bin set so that the wax would cure and then I added coordinating ribbon for handles - SO CUTE.
Next up were baskets for the top shelf of the changing table. I bought two dark utility baskets.
They already had liners in them that were loosely sewed on to the basket which made for easy removal and reuse.
I carefully removed the liner from the basket and sprayed them with white primer. I was still going to use the Chalky Finish to paint them, but because I was going over a dark color I needed to get between all the weaved reeds, so priming them first was important.
I painted the baskets with the same green that I used inside the bins - Refreshing, using a brush to apply the paint. I just dabbed the
brush inside the weaves as much as I could but decided not to stress
about it. The paint color was light enough to not reveal any missed
spaces inside the weaves.
Once I had a few coats of paint on, I
didn't apply any protective coat to the baskets due to the nature of
the surface, and the inside would be lined anyway.
Finally, I loosely sewed the
liner back inside the basket. They look like they were made for a baby's room!
The changing table looked great with the new baskets and bins.... check it out!
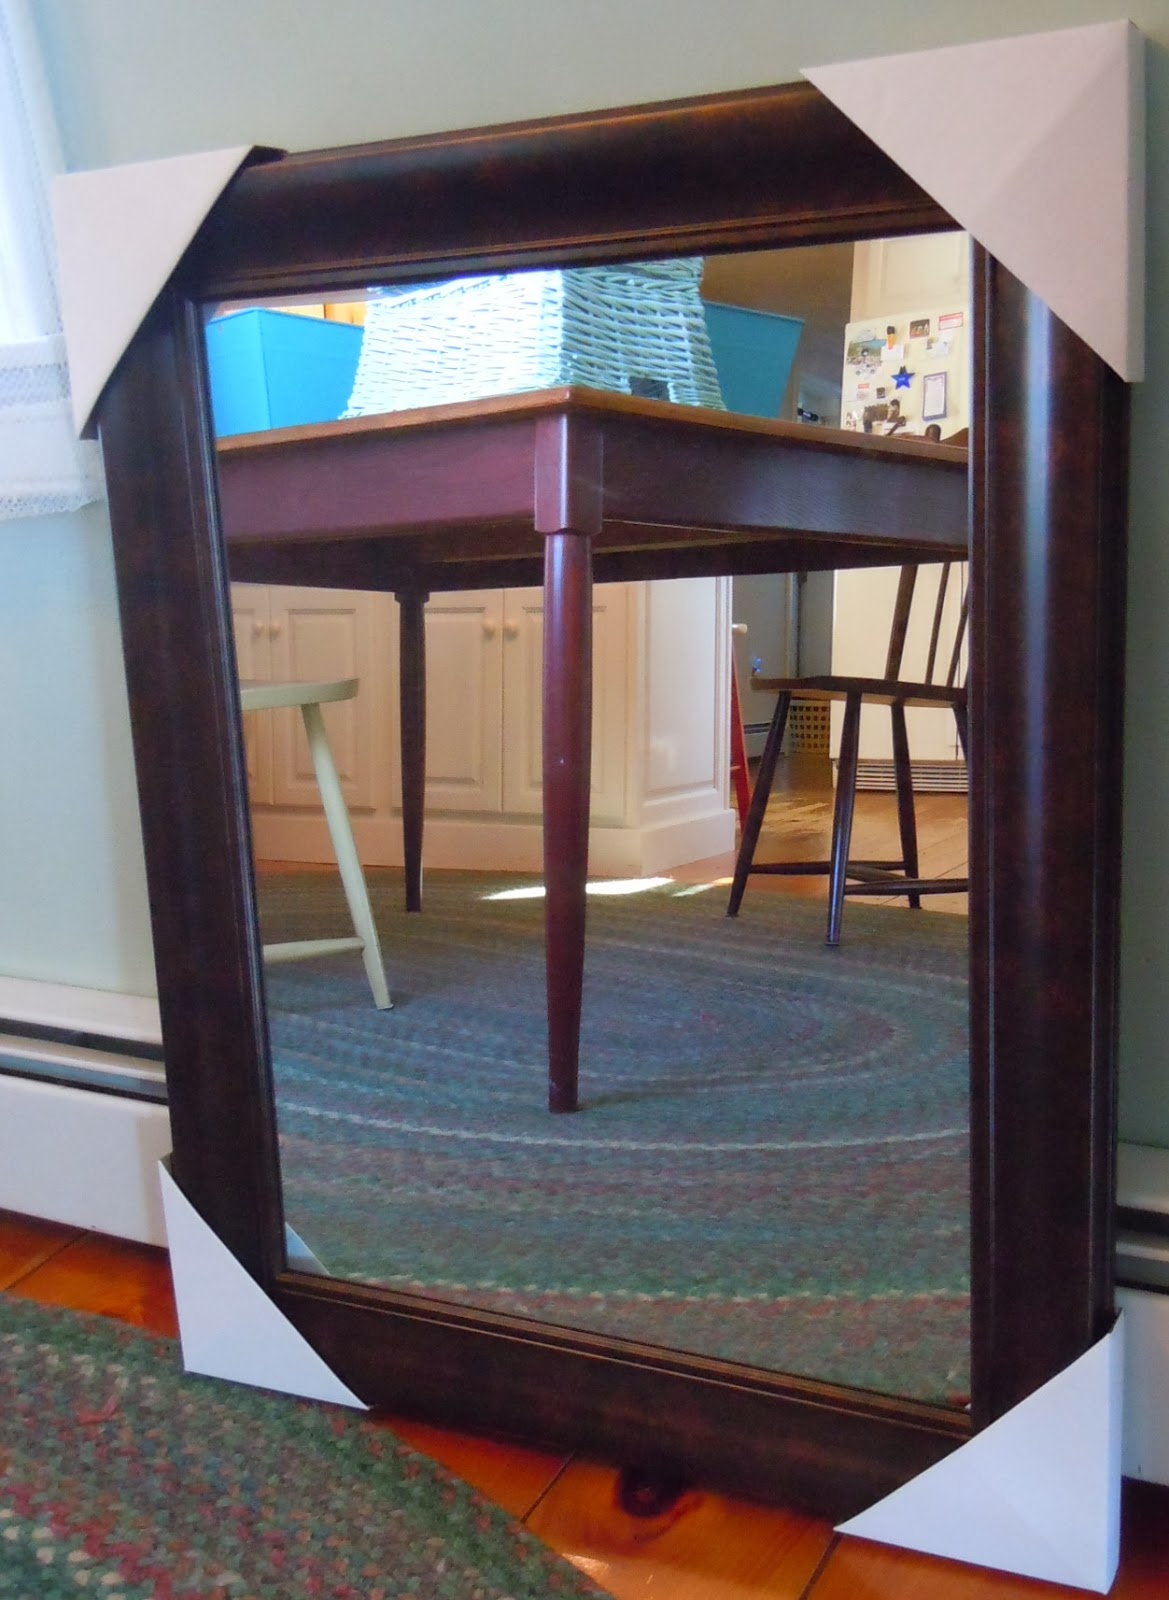
I turned my attention to the mirror next. I wanted the mirror to have a crackle surface so before I began painting, I created a test board to decide which colors had the best look for the baby's room. I decided to go with the white over turquoise (Everlasting over Treasure), it's pictured in the lower right corner of the photo below.
I cleaned the mirror's frame, used painters tape and taped off the glass so I wouldn't get paint on it, and applied the Chalky Finish paint in Treasure.
After two coats of paint had dried and rested, it was time to apply the Americana DECOR crackle medium.
I applied it in various areas instead of all over because I wanted random patches to come through the white top coat. As I brushed it on, I let the brush run out of crackle medium instead of just stopping abruptly so the crackle would taper off into the solid (un-cracked) areas.
When it was dry, (about 45 minutes) I applied the Everlasting overcoat of paint. I applied the paint by dabbing it on with a sponge, using this technique created small uniform cracks. (Brushing would have caused the cracking to be larger and more in rows in the direction of the bristles. Once the overcoat of paint has been applied leave the paint alone and let it dry. If you try re-dabbing or brushing the paint it will pull and lift and make bare areas in the crackle.
I let everything rest 24 hours. I chose to use DecoArt DuraClear Satin waterbase varnish for the protective finish. I thought it would be a better protective coat against window cleaner that would be used on the mirror. I brushed it over the whole frame and let it dry.
For a few accents in the room and to play with the materials that I had, I mixed some yellow Americana paint with the Everlasting Chalky finish paint to create a soft yellow color and painted an old lamp that I found in our basement. The wax finish was applied for protection using a rag. Then I found the perfect shade for it on clearance at a nearby department store.
I also mixed some Americana Tangelo Orange paint with Everlasting Chalky Finish Paint for a soft orange color and painted the cover of a jar as a useful accent piece in the nursery.
The used bureau that I found was made from Maple and had great bones. It was the perfect size for a nursery.
My son worked the paint roller getting the walls ready.
Adorable curtains were found at a great price and they continued the circle pattern that was used in the ribbon bin handles.
The Project is finished and the Nursery is ready for Baby!
Nothing was difficult about the entire project, it just took the right materials and some effort. Except maybe Vic making the changing table, but an old one could have been found and painted instead.
Now it's back to the studio and time to paint again!


Comments
Post a Comment